Sunday, June 26, 2011

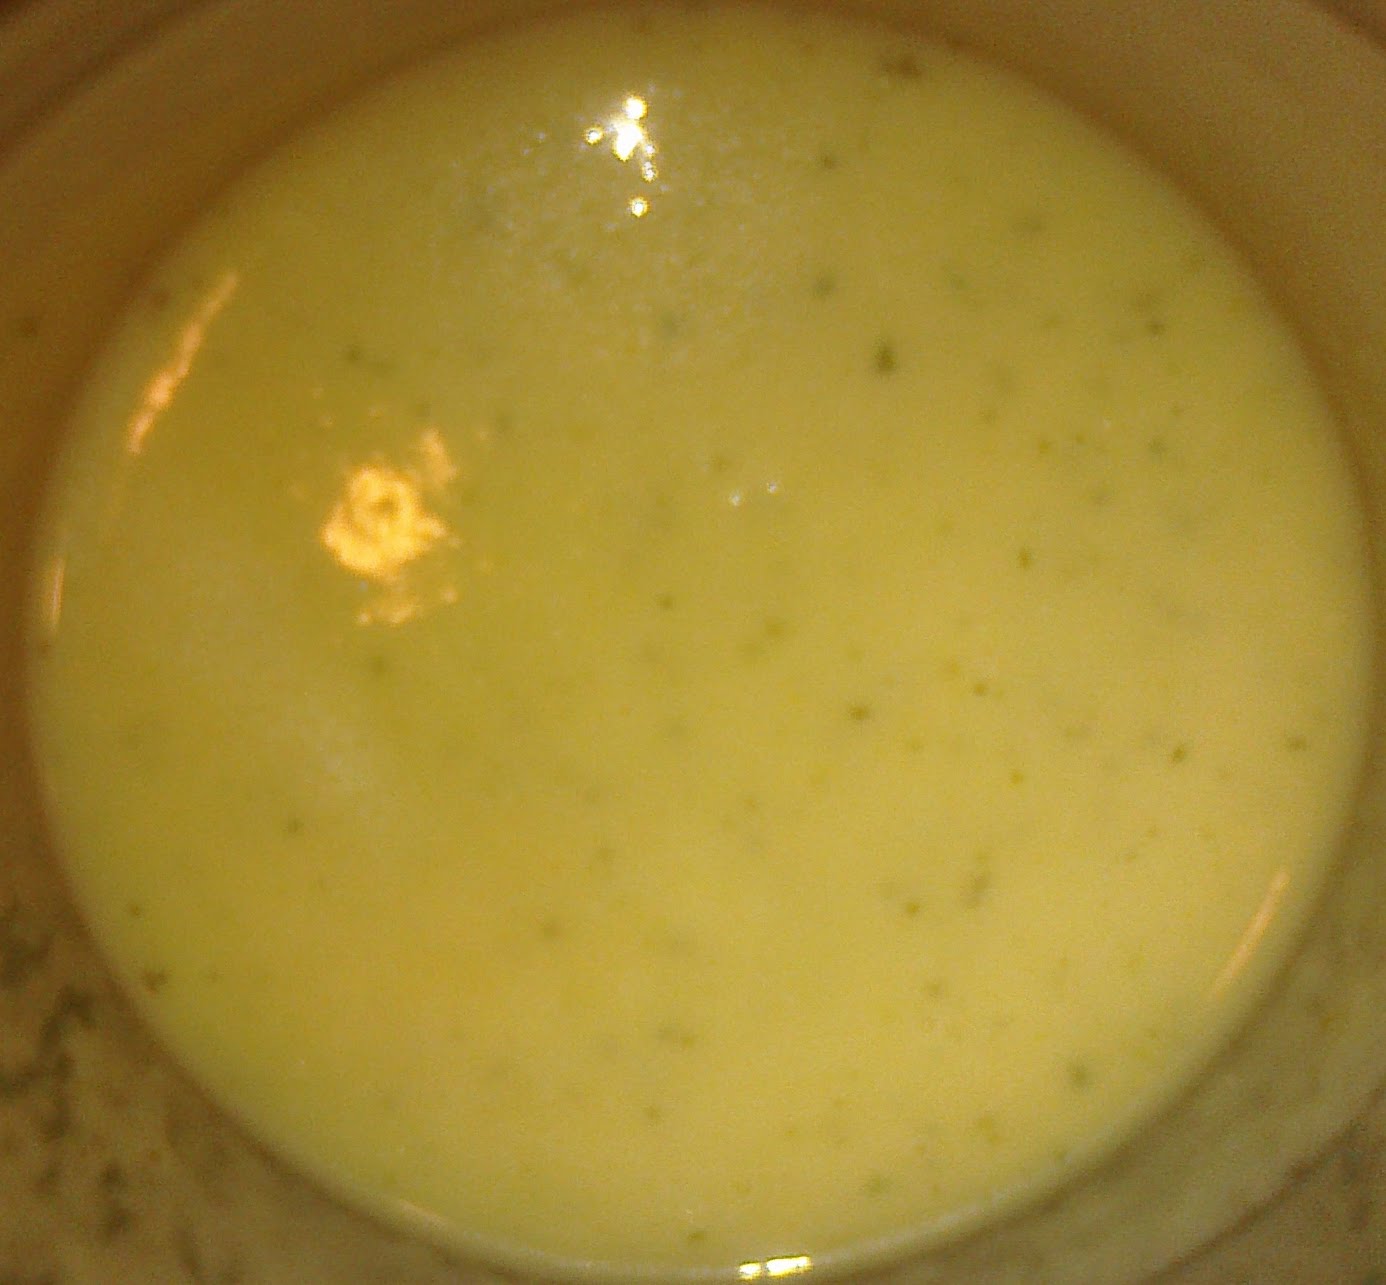
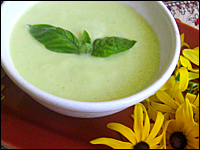
Cool Zucchini Soup Courtesy of Chez Pink (aka Big Ass Zucchini, Part I)


My best friend, Chez Pink, has her first vegetable garden. Lucky for me, I get to benefit from her spoils. First up, world's (or Hapeville's) biggest zucchini ever!


After weighing in at 4 1/2 pounds, I knew I had to come up with multiple applications for this puppy! I decided to start with Some Cool Zucchini Soup...unfortunately, it only used about 1/6 of the zuke. I got this recipe from NPR about 3 years ago when I was driving into work, I believe on my last day at EarthLink (or near to it).

Cool Zucchini Soup
Yields 4 Servings

Chef's Note: This is a very satisfying version of the zucchini-mint soup I so enjoyed. I've never quite figured out how to add the flavor of the mint while still preserving the smooth texture. I'm still working on it. But using mint as a fine herbal garnish works well, as does using basil.

Ingredients:
1/4 Cup oil, olive
2 Medium squash, zucchini coarsely chopped
1 Medium onion, yellow coarsely chopped
1 Large lemon zested
1 Cup stock, chicken, low-sodium or vegetable
1/2 Cup buttermilk, reduced-fat or less, to taste
1 to taste salt and pepper
4 Sprigs basil or mint, fresh finely chopped or julienned


Directions:
Place the oil in a heavy pot. Add zucchini, onion, lemon zest and a little salt to help draw out the juices. Sweat them, covered, for 25 minutes. Check and stir frequently. Don't let the zucchini brown. Don't overcook it, either, or it will take on an unappetizing olive hue.


When the vegetables are quite tender but not mushy, add the stock. Simmer everything together for 5 minutes.

Using a blender set on high, puree the soup in batches and strain it through a fine strainer or sieve, discarding any fibrous solids. Whisk in buttermilk to taste and chill at least 4 hours.

Thursday, June 23, 2011

Peanut Butter Blondies for Camp Sunshine


This week was Camp Sunshine week at work. One of my employees, Jessie, is a long-time survivor of leukemia and attended Camp Sunshine as a kid. Ever since, she has been a camp counselor and goes back every summer for a week for the Keencheefoonee Road Race. Prior to her trip, she hosts a mini-bake sale at work and since my arrival 15 months ago, I started to contribute. The deal is, donate for a sweet treat, a little or a lot. It is always a big success, especially in a small company like ours.

Peanut Butter Blondies

Ingredients:
1 1/2 Cup sugar, white
1/2 Cup peanut butter, creamy or crunchy
3 Large egg, whole
1/2 Cup butter, unsalted softened
1 Teaspoon extract, vanilla
1 Cup flour, all-purpose
1/2 Teaspoon baking powder
1/2 Teaspoon salt, table
6 Ounce(wt)s chocolate chips, semisweet

Directions:
Preheat oven to 350 degrees.

In a large mixing bowl, cream together the sugar, peanut butter, eggs, butter and vanilla. In a separate bowl, mix together the flour, baking powder and salt. Add the dry ingredients to the wet ingredients and mix until smooth. Stir in the chocolate chips.

Spread into an ungreased 9x13 pan (metal or glass)**. Bake at 350 degrees for about 35 minutes. The will be cracking and brown around the edges when done.

Cool, cut and serve (best when served slightly warm).

**If you don't know the ATK sling method, I swear by it.
Making a Foil Sling: Cut 18-inch length foil and fold lengthwise to 8-inch width. Fit foil into length of 13 by 9-inch baking pan, pushing it into corners and up sides of pan; allow excess to overhang pan edges. Cut 14-inch length foil and fit into width of pan in the same manner, perpendicular to the first sheet (if using extra-wide foil, fold second sheet lengthwise to 12-inch width). Spray with nonstick cooking spray.

Wednesday, June 15, 2011

Mocha Cupcakes from Ms. Paula Deen


So I have become the cupcake queen at work...I'll try anything once. But after one try, I have to change it and mold it and make it my own. So while I took inspiration from Ms. Deen, the Southern Belle herself, these have been edited from her original.

Now hers included a Kahlúa cream center. The problem was it was to be made with Chocolate Cool Whip - this is the holy grail of ingredients as it took me months to find. You would have thought that I was a 49er panning for gold or something. I found it after much searching and a day trip down south, but it wasn't worth it for the amount you end up putting in. Now maybe if you carve out some of the cupcake it might be worth it, but honestly these are so moist and delish - you don't need it.

Mocha Cupcakes
Yields 30 cupcakes

Ingredients:
2 1/4 Cups flour, all-purpose
2 Cups sugar, white
3/4 Cups cocoa powder (unsweetened)
1 1/2 Teaspoon baking soda
1 Teaspoon baking powder
1/2 Teaspoon salt, table
1 Cup oil, vegetable
1 Cup coffee, brewed cooled *espresso is preferred
3 Large egg, whole
8 Ounce(wt)s sour cream
1 Teaspoon extract, vanilla
24 Each chocolate covered coffee beans for garnish

Directions:
Preheat the oven to 350 degrees.

Line muffin pans with paper liners and set aside.

In a large bowl, whisk flour, sugar, cocoa powder, baking soda, baking powder, and salt.

Add oil, coffee, and eggs. Beat at medium speed with an electric mixer until smooth. Mix in the sour cream and vanilla.

Spoon the batter evenly into prepared muffin cups, filling each 2/3 full. Bake until a tester inserted in center comes out clean, for 16 to 18 minutes. Let them cool in pans on wire racks for 5 minutes. Remove from the pans and cool completely on wire racks.

Coffee Buttercream Frosting for Mocha Cupcakes
1 Cup Crisco, butter-flavored sticks
6 Cups sugar, powdered
3/8 Cup cooled coffee, brewed *espresso preferred
1/8 Cup, liqueur, Kahlúa

In a medium bowl, beat the butter at medium speed with an electric mixer until creamy. Gradually add the confectioners' sugar, beating until smooth, then beat in the coffee and Kahlúa.

Spread the Coffee Butter cream frosting evenly over the cupcakes and garnish with chocolate covered coffee beans, if desired.

Saturday, September 20, 2008

Capellini and White Clam Sauce


This is one of my favorite dishes. Perfect for a weeknight and the only seafood dish I can cook for myself, this is a treat that I try and enjoy one a month. The recipe calls for 2 cans of minced clams, but I usually use 1 can minced and 1 can chopped. Before you scoff at canned clams - they are delicious and a lot less work than buying, scrubbing and cooking whole fresh clams.

If you insist on using fresh, you need to buy a bottle of clam juice to add to the sauce. When it is time to add the clams, you will need to turn the heat up a bit and put a lid on the pan. Steam in the sauce until ALL the clams have opened.

Capellini and White Clam Sauce
From Nancy Sparks Frank (Mom)
Yields 3 servings

2 Tablespoons butter
2 Tablespoons oil, olive
2/3 Cups wine, white
13 Ounce(wt)s clams, canned minced (reserve juice)
1 Teaspoon basil, dried
6 Cloves garlic, fresh minced
1/4 Cup parsley, curly chopped
3/4 pound pasta, capellini

In a medium skillet, melt butter and olive oil over medium heat. Add clam juice and wine. Add basil. Let simmer for 5 to 10 minutes, until basil is softened. Add minced garlic. Turn heat to low and simmer for 10 minutes. Add clams, heat through.

Cook pasta as desired.

Add parsley to the sauce, stir and serve over cooked pasta.

Thursday, September 18, 2008

Creamy Cocktail Sauce

During Culinary School we were often called upon to develop our own recipes for things. My partner in crime was fellow chef Patti Smith. She and I would spend lots of time brainstorming of new items for us to try. Some things wouldn't work out so well, but most of our creations I still use today and on a regular basis. Here is one of my favorites - this is perfect for steamed or boiled shrimp and has a regular place on our Kentucky Derby Party table.

Creamy Cocktail Sauce
Yields 2 cups

Prep Time: 10 Minutes

1 1/4 Cup mayonnaise
1 Tablespoon horseradish
2 Tablespoons chili sauce
2 Tablespoons ketchup
1 Tablespoon bell pepper, red finely diced
1 Tablespoon bell pepper, green finely diced
1 Tablespoon shallots minced
1 Tablespoon chives, fresh chopped
1 Tablespoon vinegar, red wine
1 Tablespoon oil, vegetable
2 Teaspoons paprika
1 Teaspoon pepper, cayenne
2 Teaspoons sugar, white
1 to taste salt
1 to taste pepper, white, ground

Combine all ingredients in the bowl of a food processor and blend well. Let the sauce stand overnight, covered and refrigerated, to develop its full flavor.

Wednesday, September 17, 2008

Baked Pork Chops with Parmesan-Sage Crust

This is one of my favorite week night, somewhat easy to do after work meals. I am a fan of pork chops and you can buy them at such a great deal at Costco. I buy them and freeze them in small batches. On nights I want to cook with them, I put them in the fridge the night before to defrost.

These have an amazing flavor and form a great crust. I prefer to use boneless pork chops and usually use more oil and skip the butter.

Baked Pork Chops with Parmesan-Sage Crust
From Bon Appétit, February 2001
Yields 4 servings

Prep Time: 10 Minutes
Cook Time: 30 Minutes

1 1/2 Cup breadcrumbs, fresh or Panko
1 Cup cheese, parmesan, grated
1 Tablespoon sage, rubbed
1 Teaspoon zest, lemon
2 Large egg, whole
1/4 Cup flour, all-purpose
4, 9-ozs pork chops, loin, bone-in or boneless-6-oz
2 Tablespoons butter
2 Tablespoons oil, olive

Preheat oven to 425 degrees. Mix breadcrumbs, cheese, sage and lemon peel in pie dish. Whisk eggs in medium bowl to blend. Place flour on plate; season generously with salt and pepper. Coat pork chops on both sides with flour; shake off excess. Dip chops into eggs, then coat on both sides with breadcrumb mixture.

Melt butter with oil in heavy large ovenproof skillet over medium-high heat. Add pork chops to skillet and cook until golden brown, about 2 minutes per side. Transfer skillet with pork to oven. Bake until pork chops are crisp on the outside and meat thermometer inserted into pork registers 150 degrees, about 20 minutes.

Transfer chops to plates. Garnish with lemon wedges and orange wedges, and serve.

Garlic Marinated Lamb with Garlic Chive Mashers

I've always been a fan of Ming Tsai as he does an excellent job with fusion food. My dad brought home some 2-inch thick lamb loin chops and we wanted something new to use for a marinade. I did a little searching and found this at Food TV and it looks delicious. We didn't have 12 hours to marinate, but we were able to squeeze in 4 or 5 hours and that did the trick. I can only imagine how amazing these would have tasted with a full 12 hours to sit in all that garlic.

I would marinate these in the morning before you head off to work and fire up the grill as soon as you walk in the door that evening.

Garlic Marinated Lamb with Garlic Chive Mashers
From Ming Tsai
Yields 4 servings

Prep Time: 12 hours
Cook Time: 45 minutes

12 lamb loin chops
1/4 cup Dijon mustard
1/3 cup garlic, minced
1/4 cup thin soy sauce (not tamari - I used low sodium soy sauce)
1/3 cup canola oil (I used peanut oil)
1/2 cup red wine
1 tsp coarse ground black pepper

Mix all ingredients together and marinate chops for at least 4 hours, preferably overnight. Grill to desired doneness.

6 to 8 large yukon gold potatoes, washed
8 garlic cloves
1 cup chopped garlic chives, may substitute regular chives
1 cup heavy cream
1 tablespoon butter
Salt and black pepper to taste

Bake the potatoes until fully cooked (about 45 minutes at 350 degrees). In a saucepan, saute half of the chives and garlic in a little butter. Add cream and reduce by 50 per cent. With a hand blender, mix well and check for seasoning. Add the remaining chives. Hand mash the potatoes, skin and all. Add the cream, butter and check for seasoning. Serve with vegetable following.

Tuesday, September 16, 2008

Cool Zucchini Soup


I heard about this on NPR a few weeks ago and after a quite fruitful trip to a local Farmer's Market on Saturday, I had some of the freshest zucchini I has ever seen in my hot little hands. I decided it was the perfect time for making this soup.

The zucchini was so fresh that the soup had a slight sweetness to it. I garnished it with some freshly sliced basil from my parent's garden and we ended up with a delightful starter to our meal that could also have been enough of a meal on its own with some crusty baguette and a nice compound butter.

Enjoy!

Cool Zucchini Soup

Chef's Note: This is a very satisfying version of the zucchini-mint soup I so enjoyed. I've never quite figured out how to add the flavor of the mint while still preserving the smooth texture. I'm still working on it. But using mint as a fine herbal garnish works well, as does using basil.

Makes 4 servings; Yields 1 quart

1/4 cup olive oil
2 small to medium zucchini, coarsely chopped
1 onion, coarsely chopped
Zest of 1 lemon
1 cup chicken or vegetable stock
1/4 to 1/2 cup buttermilk, to taste
Salt and pepper
Basil or mint sprigs, finely chopped or julienned, for garnish (optional)

Place the oil in a heavy pot. Add zucchini, onion, lemon zest and a little salt to help draw out the juices. Sweat them, covered, for 25 minutes. Check and stir frequently. Don't let the zucchini brown. Don't overcook it, either, or it will take on an unappetizing olive hue.

When the vegetables are quite tender but not mushy, add the stock. Simmer everything together for 5 minutes.

Using a blender set on high, puree the soup in batches and strain it through a fine strainer or sieve, discarding any fibrous solids. Whisk in buttermilk to taste and chill at least 4 hours.

Monday, September 15, 2008

Citrus Marinated Pork Chops

Citrus Marinated Pork Chops

Serves 4

4, 8-oz double thick cut boneless center cut pork chops
2 Tbls Extra Virgin Olive Oil
1 Tbls grainy mustard
10 sprigs of thyme, leaves removed from stems and chopped
Zest and juice of 1 lime
Zest and juice of 1 lemon
Zest and juice of 1 orange

In a gallon plastic bag or a high-sided baking dish mix, whisk together the orange, lemon, and lime juice and zest, thyme leaves, grainy mustard, and oil. Place meat into the marinade and let sit for at least 15 minutes - 1 hour is better. If using this marinade for chicken, do not let it marinate over 1 hour as it may begin to cook the chicken. The pork can last much longer, but more than 1 hour, put it in the fridge.

Build a medium fire. Sear the chops over the heat, 3 minutes a side. Dip the chops back in the marinade and move next to the coals (indirect) for 10 to 15 minutes (depends on how thick the chops are). Cook to an internal temperature of 155 degrees. Remove from grill and let sit for 5 to 10 minutes to allow the juices to redistribute.

Serve with fresh veggies from the farmers market steamed or grilled with a little lemon pepper. We had fresh red and green okra from the Saturday markets and oven-roasted acorn squash with a little butter and brown sugar for our starch.

Tuesday, March 25, 2008

Pecan Day: Kahlùa Lace Sandwich Cookies

Today, March 25th, is Pecan Day. Therefore I decided to post one of my favorite recipes from years past using pecans. Since I am allergic to nuts, I have to be very careful when making these cookies, and I can only eat a couple before I start to have a problem. But these are so very worth the discomfort.

I found these in a Kahlùa ad in a magazine sometime in the late 1980's or early 1990's. My friends LOVE these cookies.

Kahlùa Lace Sandwich Cookies
Yields 2 dozen

Oven Temp: 375

1/2 Cup butter
1/2 Cup coffee powder, instant
1/2 Cup corn syrup, light
1 Cup flour, all-purpose
2/3 Cups sugar, light brown, packed
1/2 Cup pecans ground
22 Teaspoons cocoa powder (unsweetened) divided
1 1/3 Cup sugar, powdered
4 Teaspoons water, hot
3 Tablespoons liqueur, Kahlúa

Grease cookie sheets, preheat oven to 375 degrees.

In saucepan, mix butter, corn syrup and brown sugar, bring to a boil. Remove from heat. In a bowl, mix together coffee powder, flour, pecans and 4 tsp of cocoa and stir into hot mixture. Mix well. Consistency will be a thick syrup.

Drop by level teaspoons onto cookie sheets, 2 inches apart. Bake 5 to 6 minutes. Cool 2 minutes and remove with spatula onto cooling rack.

Meanwhile, mix powdered sugar, remaining cocoa and water until smooth. Stir in Kahlùa. Spread onto bottom of 1 cooled cookie and place another on top to make sandwiches.

Sunday, March 23, 2008

Toast Day: Bruschetta


Toast can take so many forms. My personal favorite is French Toast. I'm not sure that's what Toast Day really means, so I will save that recipe for another time (I mean, really, there has to be a French Toast Day, right?).

Bruschetta
Yields 6 servings

6 plum tomatoes, diced
2 Tbls balsamic vinegar
1 head garlic, broken into cloves, divided
3 tablespoons extra-virgin olive oil, divided
6 leaves basil, fresh, cut into ribbons
1 loaf Italian or French bread
Kosher salt and pepper

Mix together 2 cloves of minced garlic, the chopped tomatoes, the vinegar and 1 tablespoon of the olive oil. Season with salt and pepper as desired. Set aside to martinate for 30 minutes. At the last minute, stir in the fresh basil.

Preheat oven on broiler setting. Place a rack approximately 6 inches from broiler.

Slice the loaf of bread, on the bias, into 3/4-inch slices.

lace bread in oven on sheet pan and broil until golden brown on both sides, approximately 2 minutes for the first side and 1 to 1 1/2 for second side.

Remove to a platter and rub each slice of bread with the cloves of garlic and then brush with olive oil. Sprinkle with salt and pepper and serve immediately.

Saturday, March 22, 2008

National Bavarian Crêpes Day: Dessert Crêpes


I love crêpes and it is a rare occasion we make them as the cooking process takes so long - just getting through a batch. But my favorite is then turning these into blintzes. Yum.

Dessert Crêpes
From Nancy S Frank
Yields 6 servings

3 Large egg yolk
1 Dash salt, table
1 Cup milk, whole
2 Tablespoons brandy
1/2 Cup water
1/2 Teaspoon extract, vanilla
1/4 Cup sugar, white
1 1/8 Cup flour, all-purpose
2 Tablespoons butter, unsalted melted and cooled
1 to taste cooking spray, butter-flavored

In a blender, blend thoroughly. Add melted butter. Blend. Refrigerate batter for at least 30 minutes.

In a 5- to 6-inch diameter pan, on high, spray with cooking spray and then cover bottom of pan as thinly as possible with batter and turn pan to coat evenly (about 2 tablespoons batter).

Oil cookie sheet and place cooked crepes on it.

Friday, March 21, 2008

California Strawberry Day: Strawberry Daiquiri


In my neck of the woods, I can't guarantee California Strawberries, but since it is Friday I figured a cocktail was the way to go no matter where the strawberries were grown.

Strawberry Daiquiri
Yields 1 serving

Ice cubes
2 parts light rum
1 part Triple Sec
1 part fresh strawberries, tops trimmed off
Lime juice, as needed
Lime wedges
Sugar

Add to a blender and puree the ice cubes, light rum, Triple Sec, fresh strawberries and lime juice. Rub the rim of a glass with lime. Roll the glass in sugar. Garnish with lime wedges. Enjoy!

Thursday, March 20, 2008

Ravioli Day: Prosciutto Ravioli

I love Ravioli, but sometimes it can just be too labor intensive. However, I got this super simple recipe from Giada de Laurentis and they are delicious.

Prosciutto Ravioli
Recipe courtesy Giada De Laurentiis
Yields 6 servings
Difficulty: Easy
Prep Time: 30 minutes
Cook Time: 15 minutes


15-ounce container whole milk ricotta cheese
10-ounce package frozen chopped spinach, thawed, squeezed dry
4 ounces thinly sliced prosciutto, chopped
2 large egg yolks
3/4 teaspoon salt
1/2 teaspoon freshly ground black pepper
48 wonton wrappers
1/2 cup butter
1 1/2 teaspoons dried oregano
Freshly grated pecorino

Whisk the ricotta, spinach, prosciutto, egg yolks, salt, and pepper in a medium bowl to blend.

Place 1 tablespoon of the ricotta filling in the center of a wonton wrapper. Brush the edge of the wrapper lightly with water. Fold the wrapper in half, enclosing the filling completely and forming a triangle. Pinch the edges to seal. Transfer the ravioli to baking sheets. Repeat with the remaining filling and wrappers. (Can be prepared up to 2 hours ahead; cover and refrigerate.)

Melt the butter in a heavy small skillet over medium heat. Add the oregano and stir 1 minute. Season, to taste, with salt and pepper. Remove from the heat.

Working in batches, cook the ravioli in a large pot of boiling salted water until just tender, stirring occasionally, about 4 minutes per batch. Transfer the ravioli to a large shallow bowl.

Pour the oregano butter over the ravioli and toss gently to coat. Sprinkle the pecorino over the ravioli and serve.

Sunday, September 30, 2007

Daring Bakers Challenge: Cinnamon Rolls and Sticky Buns

**Disclaimer - I actually wrote this up and everything on Sunday and didn't realize I never clicked on "publish." I just realized today and once I posted, the pictures did not upload. I'll fix this tonight when I get home...sorry for the delay!**

My very first Daring Bakers Challenge and it came at a really busy time...but that never stops me! This challenge was for Cinnamon Rolls and Sticky Buns courtesy of this month's host, Marce.


The recipe is from Peter Reinhardt's excellent The Bread Baker's Apprentice, so I knew that this would be a good recipe for us all to make. In my experience, if you want to make any bread-type recipe, this book is one of the best to work from. The instructions include both weights and measures and also have accompanying photos to help clear up any procedural questions.


And we're off...


I must start by saying that I did use the book itself in my work area since I had it on hand. This helped with any additional questions I might have, just having the opportunity to read up on this type of dough. It has been years since I have made any type of cinnamon roll and so I felt more comfortable reading about the ins and outs of it.


Cinnamon Rolls

6 1/2 Tbls granulated sugar
1 tsp salt
5 1/2 Tbls shortening
1 large egg, slightly beaten
1 tsp lemon extract
3 1/2 cups all-purpose flour
2 tsp instant yeast*
1 1/8 to 1 1/4 cups buttermilk, at room temperature

Cinnamon sugar:
6 1/2 Tbls granulated sugar
1 1/2 tsp ground cinnamon

White fondant glaze:
4 cups powdered sugar
1 tsp lemon or orange extract
6 to 8 Tbls warm milk

Instant yeast is also called rapid-rise or fast-rising.

Step 1 - Making the Dough:
Cream together the sugar, salt, and shortening or butter on medium-high speed in an electric mixer with a paddle attachment (or use a large metal spoon and mixing bowl and do it by hand).
Note: if you are using powdered milk, cream the milk with the sugar, and add the water with the flour and yeast.

Whip in the egg and lemon extract/zest until smooth. Then add the flour, yeast, and milk. Mix on low speed (or stir by hand) until the dough forms a ball. Switch to the dough hook and increase the speed to medium, mixing for approximately 10 minutes (or knead by hand for 12 to 15 minutes), or until the dough is silky and supple, tacky but not sticky. You may have to add a little flour or water while mixing to achieve this texture. Lightly oil a large bowl and transfer the dough to the bowl, rolling it around to coat it with oil. Cover the bowl with plastic wrap.

Step 2 - Fermentation:
Ferment at room temperature for approximately 2 hours, or until the dough doubles in size.

Step 3 - Form the rolls:
Mist the counter with spray oil and transfer the dough to the counter. Proceed as shown in the photo below for shaping the rolls.

(Transcription in case photo did not print: (A) Roll out the dough with a rolling pin, lightly dusting the top with flour to keep it from sticking to the pin. Roll it into a rectangle about 2/3 inch thick and 14 inches wide by 12 inches long for larger rolls, or 18 inches wide by 9 inches long for smaller rolls. Don’t roll out the dough too thin, or the finished rolls will be tough and chewy rather than soft and plump. (B) Sprinkle the cinnamon sugar over the surface of the dough and (C) roll the dough up into a cigar-shaped log, creating a cinnamon-sugar spiral as you roll. With the seam side down, cut the dough into 8 to 12 pieces each about 1 3/4 inches thick for larger rolls, or 12 to 16 pieces each 1 1/4 inch thick for smaller rolls.)

Step 4 - Prepare the rolls for Proofing:
For cinnamon rolls: line 1 or more sheet pans with baking parchment. Place the rolls approximately 1/2-inch apart so that they aren´t touching but are close to one another.

Step 5 - Proof the rolls:
Proof at room temperature for 75 to 90 minutes, or until the pieces have grown into one another and have nearly doubled in size. You may also retard the shaped rolls in the refrigerator for up to 2 days, pulling the pans out of the refrigerator 3 to 4 hours before baking to allow the dough to proof.

Step 6 - Bake the rolls:
Preheat the oven to 350°F (175°C) with the oven rack in the middle shelf for cinnamon rolls but on the lowest shelf for sticky rolls.

Bake the cinnamon rolls for 20 to 30 minutes or the sticky rolls 30 to 40 minutes, or until golden brown. If you are baking sticky rolls, remember that they are really upside down (regular cinnamon rolls are baked right side up), so the heat has to penetrate through the pan and into the glaze to caramelize it. The tops will become the bottoms, so they may appear dark and done, but the real key is whether the underside is fully baked. It takes practice to know just when to pull the rolls out of the oven.

Step 8 - Cool the rolls:
For cinnamon rolls, cool the rolls in the pan for about 10 minutes and then streak white fondant glaze across the tops, while the rolls are warm but not too hot. Remove the rolls from the pans and place them on a cooling rack. Wait for at least 20 minutes before serving.

Toppings for the Rolls:
White fondant glaze for cinnamon rolls

Cinnamon rolls are usually topped with a thick white glaze called fondant. There are many ways to make fondant glaze, but here is a delicious and simple version, enlivened by the addition of citrus flavor, either lemon or orange. You can also substitute vanilla extract or rum extract, or simply make the glaze without any flavorings.

Sift powdered sugar into a bowl. Add lemon or orange extract and warm milk, briskly whisking until all the sugar is dissolved. Add the milk slowly and only as much as is needed to make a thick, smooth paste.

When the rolls have cooled but are still warm, streak the glaze over them by dipping the tines of a fork or a whisk into the glaze and waving the fork or whisk over the tops. Or, form the streaks by dipping your fingers in the glaze and letting it drip off as you wave them over the tops of the rolls. (Remember to wear latex gloves.)


So everything went quite well. I had to add quite a bit of additional flour (it must have been too moist in my kitchen. I wasn't expecting the dough to take quite so long to rise as I use my KitchenAid's dough proofing setting. Unfortnately, that did very little for me and so I ended up waiting exactly as long as the recipe had stated.


Once the dough was ready for me to roll out, I was knee deep into a baby shower cake and had no time to stop. So I put the dough in the fridge and had to let it sit overnight. I was really worried that this would cause a lot of problems, but I kept my fingers crossed.


The next day, I took the dough out of fridge and let it sit for about 20 minutes. Then I rolled out, filled and rolled according tothe instuctions. I then cut the rolls and placed on parchment onto a sheetpan (some of the cinnamon mixture fell out of each one as I cut with bench scraper and sort of poured it back into the spaces.


I put the sheetpan in the oven on the proofing setting for about 25 minutes until they doubled. Once they were doubled, I baked the rolls for 22 minutes on the convection setting. Once they were cooled, I iced them - I only needed 3/4 of the glaze (I used orange extract).


These were a big hit and very tasty. There did not seem to be a big problem with refrigerating the dough for so long and picking back up the next day, which is GREAT to know! I brought in the extra rolls into work and they were devoured (luckily, I kept a couple at home for myself.

Wednesday, August 01, 2007

A Birthday Miami-Style


It that busy time of the year when I end up making a dozen birthday cakes in the span of 3 weeks. I don't mind really, as this is something I enjoy doing for friends

Today was my friend Lisa's birthday and originally she had opted for an Orange Cake with Chocolate Glaze. Two days before, she saw me reading Ivonne's blog and saw the Mojito Cupcakes and she asked if I could make it into a cake. I love a challenge, so why not? I bought all the ingredients and followed Ivonne's lead.


First was the cake, itself. I followed the instructions and whipped up the batter - surprisingly it did not contact any lime, and just a little rum. But the batter was thick and beautiful and tasted divine.


Once I pulled the cake from the oven and allowed it to cool, I could see the tight crumb texture and knew that this cake would take a lot of flavor from the syrup.


After soaking the cake and letting it cool the rest of the way, I whopped up the icing and lathered it on. After eating the cake (it was amazing, by the way), I think I will probably make a couple of slight changes the next time. Since lime zest doesn't have tons of lime flavor, I think I might try using less zest and a couple of splashes of lime juice instead.


Mojito Cake
Yields 1, 1/4-sheet cake or 10-cup bundt cake

Chef’s Note: I recommend storing this cake in the refrigerator due to the cream cheese and butter in the frosting.

1 cup buttermilk, at room temperature
1 Tbls dark rum
1/2 tsp vanilla extract
3 cups all-purpose flour
1 tsp baking powder
1/2 tsp baking soda
1 tsp salt
1 cup butter, at room temperature
2 cups sugar
4 large eggs, at room temperature

Preheat the oven to 325 degrees. Place a rack in the center of the oven.

Combine the buttermilk, rum and vanilla extract. Set aside.

Combine the flour, baking powder, baking soda and salt. Sift together and then set aside.

In the bowl of a stand mixer, fitted with the paddle attachment, combine the butter and sugar. Mix on medium-high speed until light and fluffy (about 4 to 5 minutes).

Reduce the speed to low, and add the eggs one at a time. Scrape down the sides of the bowl after each addition.

With the mixer still on low speed, add 1/3 of the dry ingredients and mix well.

Add half of the buttermilk mixture and mix well, scraping down the sides of the bowl if necessary. Mix for a minute or two.

Add another third of the dry ingredients (on low speed) and mix well.

Add the remainder of the buttermilk mixture, once again scraping down the sides of the bowl if necessary. Mix for another minute or two.

Add the remainder of the dry ingredients (on low speed) and mix for a minute or two, until the batter is smooth. Scrape down the sides of the bowl to ensure that all of the flour has been incorporated.

Pour cake into buttered and floured 9x13 ¼-sheet pan.

Bake the cake for 40 to 45 minutes and then test for doneness by inserting a cake tester into the center of the cake. If it comes out clean, it is done.


Remove the cake from the oven and let cool for 10 minutes. Flip onto a serving platter or cake board and poke holes in the top with a skewer or toothpick. Immediately spoon the slightly cooled rum syrup over the warm cake and let it soak it all up. Once it has cooled completely, you can ice the cake with the lime and rum frosting.

For the rum syrup:
1 cup sugar
1/4 cup water
1/4 cup butter
1/4 cup dark rum
2 or 3 pieces of lime zest
½ bunch fresh mint

In a small pot, combine the sugar, water and butter over medium-high heat. Bring the mixture to a boil, stirring often. Once the butter has completely melted and the sugar has dissolved, remove from the heat.

Carefully add the rum. The mixture will bubble and spurt so take care not to burn yourself.

Once you’ve mixed in all the rum, add the lime zest and mint and let the syrup infuse for 15 minutes before spooning over the cake.

For the lime and rum frosting:
2, 8-oz packages cream cheese, at room temperature
1 1/2 cups butter (3 sticks), at room temperature
2 cups powdered sugar
1/4 cup dark rum
Zest of 4 limes (use a microplane if you have one)

In the bowl of a stand mixer, fitted with the whisk attachment, combine the cream cheese and butter at high speed for 5 minutes.

Reduce the speed to low and add the powdered sugar in two batches. Mix for a minute to incorporate the sugar and then increase the speed to high again and mix for another minute or two. The frosting should be light and fluffy.

Turn off the mixer and scrape down the sides of the bowl. Add the rum and the lime zest and mix at medium speed until well incorporated.

Tuesday, July 24, 2007

Lemony Snicket


I am working on this big project at work, and there are 15 of us who are trapped in a room all day glued to our laptops, running around helping each other and trying not to let the rest of the company into out little haven.

One of the women has been baking any type of cookie she could think of and bringing in plates and plates of them to these sessions. She is fabulous, but the team was looking for a change. One of the other ladies in the group starting buying grocery-store cakes and bringing them in - thanks, but not for my palate.


So I decided it was time to being in one of my lemon cakes. Depending on who I have made this for, it has been referred to as my Lemon Coffee Cake, my Lemon Pound Cake, or my Lemony Goodness (scary name, I know). This cake is really very easy and uses a boxed cake mix (not something I will do on a regular basis) and a box of flavored Jell-O. Its quick and easy and ever morsel is to die for. This cake is always a huge hit - I have even made it with Orange, Lime, Strawberry or Raspberry.

Lemon Cake
Yields 16 servings
Preparation Time: 5.00 Minutes
Inactive Prep Time: 30.00 Minutes
Cooking Time: 30.00 Minutes

Chef's Note: If you have it available, use 1 teaspoon of lemon oil and then reduce your amount of water by 1 teaspoon.

18 1/4 Ounce(wt)s cake mix, white
4 Large egg, whole at room temperature
3 Ounce(wt)s jello, lemon, 3-oz box
1 Teaspoon extract, lemon
3/4 Cup oil, vegetable
3/4 Cup water, cold
1 Large lemon, zested

Glaze:
1 Cup sugar, powdered
3 Tablespoons juice, lemon


Mix together the cake mix, eggs, jello, extract, oil, zest and water and beat for 5 minutes on medium. Pour into greased and floured bundt pan.

Bake at 350 degrees for 45 to 55 minutes, or until a toothpick inserted in the center comes out clean.

Let cool for 10 minutes in the pan, then turn it out onto a cake circle or a serving plate. Let cake cool an additional 20 minutes before glazing.

Mix together remaining ingredients. Drizzle with graze using a fork or pouring from a spouted container.

Sunday, July 15, 2007

The Curse of Friday the Thirteenth


My day started out pretty normal for a day off. My plan was to take it easy, make a cake and then head out to see a movie by 1pm. Then afterwards, I would go with my brother and his family to a “dinner party” with some old friends to see their new house. Seems simple enough, no?

Apparently not. After helping get the kids off to school, I threw on some clothes and my sister-in-law ran me up to the store for some key ingredients (eggs, butter, buttermilk). I returned home and got mixing. I sifted dry ingredients, creamed butter and sugar and, oh yeah, turned on the oven. I mixed wet with dry and alternated with the milk…easy pisy.

Then I realized the time (this cake cooks for almost 2 hours) and I quickly poured the batter into my Bundt pan. I turned to put it in the oven and realized that it was not to temperature yet. Odd, especially considering that I was baking at 300 degrees convection. Hmmmmm.

I opened the oven door and the oven was COLD! Completely devoid of any heat at all and here is this cake batter in the pan and no way to bake it. After 2 calls to KitchenAid and 6 calls to repairmen, I found a guy who would come out in the afternoon. Thank god. Oh well – no chance of seeing a movie today.

Next, I cleaned up from making the batter and realized I had never put in the tablespoon of vanilla extract – dammit! Quite the day I was having. Next thing I knew it was noon – the repairman said anytime between 12 and 2pm – so much for taking a shower. I sat any watched a DVD waiting for the doorbell to ring.

At 1:55pm, the doorbell rang. I opened the door to a very nice Russian with his bag of tools in hand. He came in, took the oven apart (did I mention this oven is only 5 months old?) and found that it needed a new thermostat. Great – so much for baking today. I walked him out with the promise of repair on Wednesday and checked next door – the neighbor was out…so much for stealing his oven for a couple of hours.

Now the stress kicks in. My Chocolate Pound Cake is doomed for the trash and I cannot stand it…all that work and nothing to take to our friends’ house for dessert. Then my sister-in-law has an epiphany…Marni! Our friend lives only 10 minutes away and she is at home with her two boys on Fridays. We give her a ring and she is game.

I run and jump in the shower, quickly get dressed and my sister-in-law comes through the door. She runs me to Marni’s house and I heat up her oven and pop my cake in. Will it work? This batter has been sitting now for like 6 hours and lord knows what will happen.


Well, the cake overflowed onto the pizza stone in the bottom of the oven, but luckily that was a very easy cleanup. The cake came out perfect looking, but who knows how it would taste.

Luckily, the cake was amazing. A quick glaze just before serving (with Vanilla ice cream, no less) and the cake is a huge success! Thank goodness – my day could not have gotten any worse, could it? I’m glad Friday the 13th doesn’t happen ever month!

Chocolate Pound Cake
Yields 16 servings

3 cups all-purpose flour
1/2 teaspoon baking soda
1/2 teaspoon baking powder
1/2 teaspoon salt
5 tablespoons cocoa
1 cup (2 sticks) butter, softened
1/2 cup vegetable shortening
3 cups sugar
5 eggs
1 cup buttermilk
1 tablespoon pure vanilla extract
Special equipment: 10-cup bundt pan

Preheat oven to 325 degrees F.

Grease and flour a 10-inch Bundt pan. Sift together flour, baking soda, baking powder, salt, and cocoa and set aside. Using an electric mixer, cream together butter, shortening, and sugar until fluffy. Add eggs, 1 at a time, and mix well after each addition.

Add flour and buttermilk alternately to butter mixture, beginning and ending with flour. Add vanilla and mix well. Pour batter into prepared pan. Bake for 1 hour and 45 minutes or until cake is done.

Remove from oven and allow cake to cool in pan for 10 minutes. Invert onto cake plate and glaze.

Chocolate Glaze:
6 ounces bittersweet or semisweet chocolate, finely chopped
8 tablespoons unsalted butter (1 stick)
1 tablespoon honey

Put all the ingredients in a microwave safe bowl or glass measuring cup. Melt at 50 percent power in the microwave until soft, about 1 minute. Stir, and continue heat until completely melted, about 1 minute more. Remove from the microwave and whisk until fully combined, smooth and glossy. While warm, pour glaze over cooled cake and do not spread.

Sunday, July 01, 2007

Italian Bribery


My brother and sister-in-law have yet to find a replacement babysitter since I moved away from the Bay Area 3 years ago. Unfortunately, this presented us with a dilemma...no one to watch the kids last night so all the adults could go into the city for a fancy, foodie birthday dinner for my dad.

Last minute, we had to volunteers from my sister-in-law's office who had no trouble watching the kids. So now the issue was - what can we make for dinner that is excellent and gourmet (without too much work) so that our new babysitters aren't stuck with pizza or fish sticks (not that we would serve either).

So I decided to go for something Italian - meatballs! And so my somewhat picky-eater of a niece would go for it...stuff them with cheese!! Maggie will eat just about anything is cheese is involved. So I whipped up a double batch (so those of us eating out could have it for lunch the next day, of course), and left it simmering on the stove. What a success - and so easy too!

Spaghetti with Mozzarella-Stuffed Meatballs
Serves 4

1/4 Cup breadcrumbs, plain
1/2 Cup milk, skim
1 Tablespoon oil, extra virgin olive
3 Cloves garlic, fresh minced
56 Ounce(wt)s tomatoes, crushed (fire-roasted if available)
1 Tablespoon oregano, dried
1 Tablespoon basil, dried
1 to taste salt
1 Pound beef, sirloin, ground (ground chuck works too)
2 Tablespoons parsley, flat-leaf chopped
1/2 Cup cheese, parmesan, grated plus more for serving
1 Large egg, whole
4 Ounce(wt)s cheese, mozzarella (part skim) cut into 1/2-inch cubes
1 Pound pasta, spaghettini

In a medium bowl, soak the bread crumbs in the milk.

In a large, wide saucepan, heat the olive oil over medium heat. Add the smashed garlic and cook until golden, about 2 minutes. Add the tomatoes, oregano and basil and season to taste with salt and let the sauce simmer over low heat, stirring occasionally.

Add the beef, chopped garlic, parsley, Parmigiano-Reggiano, egg and 1 teaspoon of salt to the soaked bread crumbs and stir with a fork until combined. Place about 2 tablespoons of the mixture in your hand and press a mozzarella cube into the center. Shape the meat around the cheese, forming a ball. Repeat with the remaining meat and mozzarella.

Stir the sauce and raise the heat to medium- low. Carefully place the meatballs in the sauce, submerging them completely. Bring the sauce to a simmer and cook without stirring for 20 minutes.

Meanwhile, bring a large pot of salted water to a boil. Add the spaghetti, cook until al dente, about 8 minutes, and drain. Toss the spaghetti with the tomato sauce and meatballs, sprinkle with Parmigiano-Reggiano and serve.

Monday, May 07, 2007

A Blue's Clues Birthday


My nephew turned two this weekend and that meant a trip for "Aunt D" to San Francisco to make the cake. This has become quite the tradition with me making semi-annual trips west for the production of the birthday cakes (my niece's birthday is in October).

Having few words yet, Will couldn't specifically ask for me to make his cake yet. However, Maggie took care of this for him for this year (mostly so I would visit and she could eat my famous chocolate cake).

Since Will has not shown an interest in anything but Blue's Clues and trains, I decided to draw Blue onto the cake as it was something I knew he would recognize. He was so thrilled with the cake, he immediately stuck his finger into the icing on Blue's ear (note above). He ended up coming back for more and more nibbles of cake and icing as his playing with his friends permitted.

The cake was a huge success and Maggie has already started talking about what she wants for her next party!


The Perfect Chocolate Cake
Serves 12 adults or 24 kids

1 Cup cocoa powder (unsweetened)
2 Cups water boiling
2 3/4 Cups flour, all-purpose sifted
2 Teaspoons baking soda
1/2 Teaspoon salt
1/2 Teaspoon baking powder
1 Cup butter, unsalted softened
2 1/2 Cups sugar, white
4 Each egg, whole
1 1/2 Teaspoons extract, vanilla

In a medium bowl, combine cocoa with boiling water, mixing with whisk until smooth. Cool completely.

Sift flour with soda, salt and baking powder.

Preheat oven to 350 degrees. Grease well and lightly flour 1/4-sheet pan.

In a large bowl, beat butter, sugar, eggs and vanilla on high speed, about 5 minutes.

At low speed, beat in flour mixture in fourths, alternating with cocoa mixture, beginning and ending with flour mixture. Do not overbeat. Pour into cake pans and smooth top.

Bake 25 to 30 minutes, or until surface springs back when gently pressed with fingertip. Cool in pan for 10 minutes. Loosen sides and remove from pan; cool on rack.


Buttercream Icing
2 Cup crisco, butter-flavored
2 Pound sugar, powdered
2 Teaspoon extract, vanilla
4 Tablespoons milk, skim

Cream shortening with electric mixer. Add vanilla. Gradually add sugar, one cup at a time, beating well on medium speed. Scrape sides and bottom of bowl often. When all sugar has been mixed in, icing will appear dry. Add milk and beat at medium speed until light and fluffy. Refrigerate in an airtight container.

Rewhip before using.

Add appropriate icing coloring to achieve desired colored icing for decorating your cake.